Calibration Equipment: Justifying Your Purchase Decision
Abstract
The need to improve corporate bottom lines, measure tighter tolerances and comply with standards such as ISO 9000, QS-9000 and Z540-1 forces quality managers to continuously improve efficiencies.
In order to help meet these goals, organizations should replace older calibration equipment with newer, more efficient models. While stated accuracy or uncertainty, are always major considerations in any such purchase, many other factors must be considered to get the best equipment for specific needs. This article examines high-end gaging products.
Begin by considering instrument uncertainty, repeatability and resolution. It's important to remember that instrument uncertainty and accuracy are not the same. Simply put, accuracy is the difference between a true value and a measured one. For example, a measuring device with 0.0005 inch (0.0127 mm) accuracy will provide readings that may be 0.0005 inch (0.0127 mm) in error.
On the other hand, an instrument uncertainty statement incorporates the use of statistical analysis to convey the probable error in a measurement. It includes the sensor's absolute accuracy, repeatability and resolution, as well as any variability introduced by the equipment's mechanics. This uncertainty is then used in conjunction with outside uncertainties, such as the environment or masters to establish an overall measuring uncertainty. Clearly, an instrument uncertainty statement contains more extensive mathematical calculations that better qualifies the instruments' measuring capability.
In the case of a measuring instrument, repeatability is a measuring device's inherent ability to consistently repeat its readings. A manufacturer's repeatability study is usually conducted when all other factors that would affect the result, such as the master and operator, are not changed. Although this is an important specification to consider, it should not be assumed that a highly repeatable system would also be accurate. Without an instrument uncertainty or accuracy statement, a repeatability statement alone provides no useful benefit.
Resolution refers to the number of trailing digits available on the display. It is also referred to as the smallest positional increment that can be seen. Once again, beware of dramatic product claims that only provide a resolution or repeatability statement. If the manufacturer's literature doesn't provide accuracy or instrument uncertainty information, have the company send it to you.
Next, consider the sensor technology used. For instance, high-accuracy gaging units use either a precision linear encoder or a laser-based interferometer. Linear encoders come in different grades and generally provide instrument uncertainties of 10 micro-inches (0.25 microns). Laser-based units, on the other hand, can routinely achieve results in the 2-3 micro-inch range (0.05-0.075 microns). Again, be sure that the accuracy specification you receive is for the complete unit, not just the sensor.
When considering accuracy, remember a phenomenon known as Abbe offset errors. The details of Abbe offset errors could fill up a separate article, but in simple terms the idea is that to minimize overall measurement error, the sensor and measurement axis must be in line. For example, dial calipers, where the measurement scale is offset from the measurement axis, are subject to Abbe offset errors. However, micrometers, where the measurement barrel is in line with the measurement axis, are not subject to Abbe offset errors.
Also evaluate the unit's style or configuration. Choices include direct reading units, which can make many different measurements within a specific range without remastering, and comparators, which must be remastered for each size to be checked. For example, Pratt & Whitney's new Universal SuperMicrometer® has a direct reading range of 2 inch (50.8 mm) and a total measuring range of up to 11 inch (279 mm). This allows the operator to make many measurements quickly and accurately over a 2 inch [50.8 mm] direct reading range before repositioning the probes. For larger direct reading ranges, laser-based instruments provide direct readings well up to 64 inch (1,635 mm) in length.
Most calibration labs historically have relied on comparators for precision measurements. These units, while relatively inexpensive to purchase, require substantially more labor than direct reading units to operate properly. For example, it's possible to calibrate an 81-piece gage block set in less than one-and-a-half hours using a direct reading unit. This same task can be done in less than eight hours using comparators. The labor cost savings achieved in gage block calibration using this method can fully justify an equipment purchase. In addition, direct reading units reduce the number of masters required. Comparators require a separate master for each value measured; direct reading units only require an upper and a lower limit master to set a range to measure within.
Additionally, users can choose between dedicated internal (ID) or external (OD) machines or those capable of doing both types of measurements. Units that do both offer many advantages. Besides the obvious cost savings associated with eliminating duplicated sensors, technicians must only become proficient with one machine. Combination units also require less bench space and allow one technician to quickly change from making OD to ID measurements.
Many other points should be evaluated to ensure that you get the right unit for your needs. Check both the units total range and the measuring table's size. Make sure it's big enough to accommodate large parts and that the table will handle the weight. The table should have integrated locating posts and T slots, which make part alignments and fixturing quicker. For ID measurements, make sure there are easy-to-use swivel, centering, tilt and elevation adjustments. When considering combination units, note whether the unit has bi-directional probes or uses a separate setup for each. Many units with separate ID and OD stations typically only observe the Abbe offset rule on one.
Ask for a demo
Before making an important investment in calibration equipment, take a test drive. If possible, include the instrument operators. They can help quantify differences in setup times and throughput. If you're not able to check out a machine in person, ask for a video.
When testing the equipment, perform a gage repeatability and reproducibility study, an excellent indicator of whether an instrument will actually perform to your expectations. GR&R studies also are referred to as machine capability studies. A typical GR&R study might consist of 10 parts of similar characteristics being measured three times by two or three operators. Once the data has been collected, a measurement error analysis and percent tolerance analysis can be made on the parts being measured. Many gage management packages include a GR&R module to simplify these calculations.
Due to the versatility of combination ID/OD calibration systems, changeover from one setup to another sometimes becomes inevitable. When assessing throughput of a particular measurement, also address the time needed to switch over from one setup to another. For instance, when changing from outside dimensions to inside dimensions, do you need to change the contact probes, force dials or some other levers? This will definitely increase calibration time. Some multifunctional gages have bi-directional probes that allow both ID and OD measurement as well as an automatic force system that requires no adjustments at all.
The method of calibrating the unit (also know as "mastering") is something else to consider. Questions include: How long does the calibration take? How long can measurements be taken without going back to the set point? Does the system allow for a few different methods of calibrations?
Other points to consider: How long is the warranty? Does the manufacturer have a return policy if the instrument does not perform to stated specifications? Do the specifications state, as a minimum: instrument uncertainty, repeatability and resolution? Does the manufacturer have a reputation for quality products and good customer service?
Compare accessories and features
Manufacturers differ in the accessories they include with the unit. Because ID/OD machines are so versatile, nearly all of them include a host of optional accessories. The probes and fingers required to do all standard calibrations can add up to 20 percent of the purchase price. The best advice here is to get a list from the manufacturer that cross-references the necessary applications to the appropriate accessories needed to accomplish your measurements.
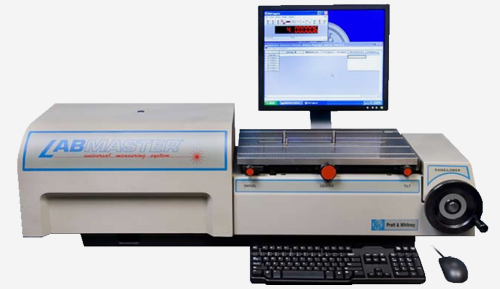
Multifunctional instruments also have come a long way with the features they incorporate and benefits they can deliver. During the past several years, the integration of computers has allowed operators to simply push a key or click a mouse to move contact probes. Equally impressive is the ability of some systems to send the measurement value to any user-specified program, such as Excel or Lotus. Other desirable features include: Windows-based software, automatic tolerancing, serial and parallel output ports, built-in bidirectional force system, two-point calibration and a modular construction.
The bottom line
With nearly any product you buy, you get what you pay for. Just be careful about what you might be sacrificing for a less expensive product or model. An instrument costing $5,000 or $10,000 less might be lacking the speed and throughput that would have paid back this amount in a relatively short period of time.
Because metrology departments still carry the stigma of being non value-added, they sometimes have difficulty getting the appropriate funding for capital equipment. Writing a long, complicated justification is almost a necessity in order to get equipment that is long overdue. When writing justifications, remember the magic word: payback. Showing how the proper new equipment will improve overall quality, increase efficiency and lower costs should enable you to get the equipment that will maximize your in-house gage calibration capabilities.
About the author
Daniel J. Tycz is Product Manager for Pratt & Whitney Measurement Systems.
Pratt & Whitney is a leading manufacturer of precision dimensional metrology instruments. Product lines include: Supermicrometer®, LabMaster®, Labmicrometer®, Laseruler®, and Measuring Machines.

 Free USB
 Product &
 Celebrating